Accessing Cancer Notifications
To access submitted Cancer Notifications.
- Search for a patient.
- Click Show.
- In the Main Menu, click Cancer Notifications.
- The Cancer Notifications screen will display with the following fields (see table below).
- Click Show for the relevant notification.
- Additional information relevant to the notification will display, including the admission date.
- Note: Other fields may appear based on previously-supplied answers — complete as needed.
- Location refers to the location of the first diagnosis of cancer.
Field | Description | Example |
|---|---|---|
Date | Date the Notification was submitted | 04/04/2018 |
Location | The location the notification was submitted. | Burswood Day Facility |
Primary Site Code | ICD 10 codes | B00 |
Primary Diagnosis Code | ICD 10 codes | B01.8 |
Laterality Code | Bilateral |
Creating a New Outpatient Notification
From the Cancer Notification screen you can create a New Outpatient Notification. This may be a Cancer Notification not linked to a Admission.
- From a Patient Record.
- Select Cancer Notifications from the menu.
- Select the Create Outpatient Notification button from the top of the screen.
- The Cancer Notification screen will open.
- Fill in all the relevant fields - for further information/detail - refer to Cancer Registry Reporting.
- Select the Create Cancer Notification button.
Deleting/Un-deleting Cancer Notifications
Cancer notifications, when deleted, are moved to the Deleted tab.
- Deleting a Cancer Notification
- Search for a patient.
- Click Show.
- In the Main Menu, click Cancer Notifications.
- Click Show for a cancer notification.
- Click Delete.
- The notification will be moved to the Deleted tab.
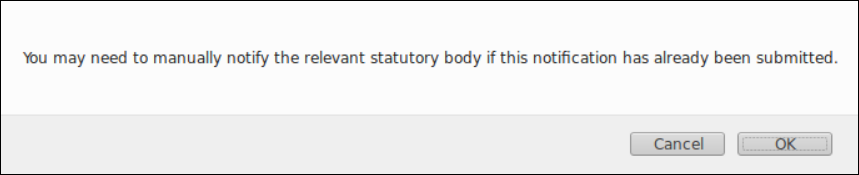
- When a notification is deleted, the following message appears. Click OK.
- Un-deleting a Cancer Notification
- Click the Deleted tab.
- Click Show for a cancer notification.
- Click Undelete.
- The notification will be returned to the notification listing in the Active tab.


Copying cancer notifications
For annual repetition of cancer notifications, it is possible to copy a cancer notification.

The following behaviours apply:
Patient address
For QLD copies the home Suburb and Postcode into “Location Of Cancer Diagnosis” and “Postcode Of Cancer Diagnosis”
For NSW and VIC copies home address fields into “Usual Residential Address”
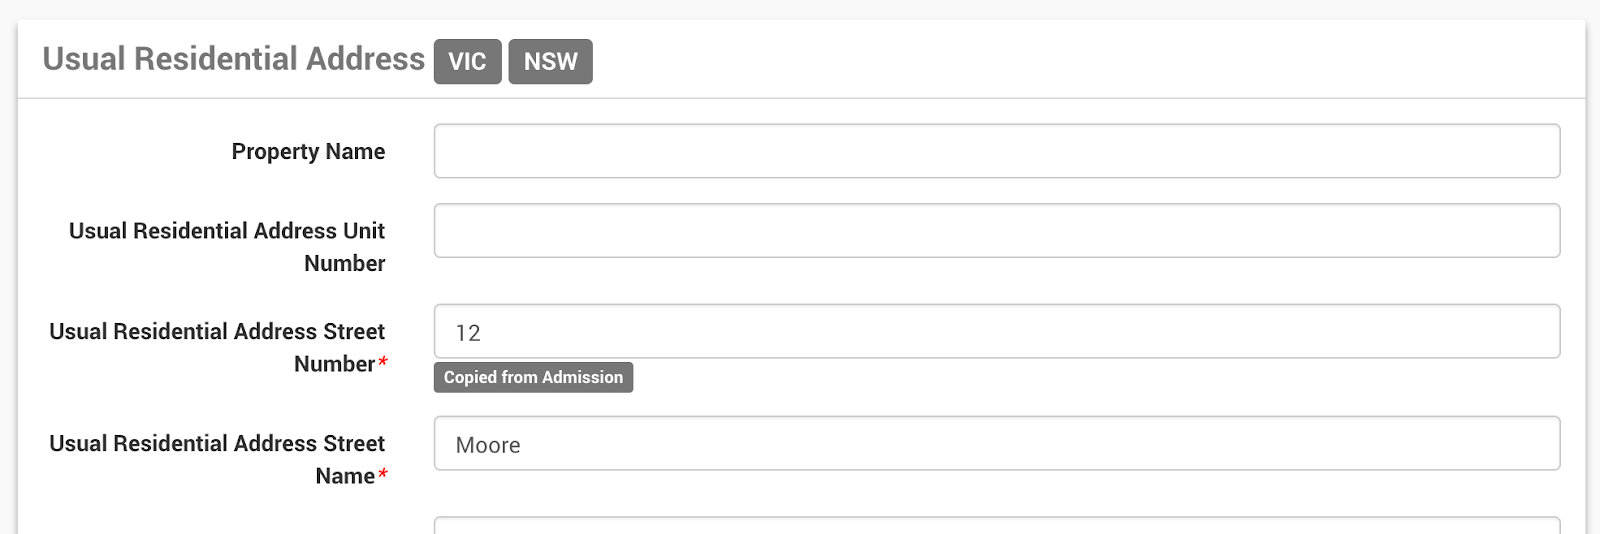
Street Number: Copied from patient admission.
Street name: Copied from admission.
Postcode : Copied from patient admission.
Suburb: Copied from patient admission.

Diagnosis codes
Primary Diagnosis Code is copying from the patient’s current admission.
Primary Site Code is copying from Primary Site Code.
The first code starting with C or D will need to be copied into this field.
The first morphology code can be copied into the Morphology field (code starting with M).
Doctor and GP details
Name field picked from first name of professional contact.
Known limitations (Reviewed July 2024, 7.0.0)
Doctor and GP details
This does not copy from patient referral.
Usual Residential Address
Mapping behaviours may differ from the data entered in a patient's home address. Ensure you review for accuracy.
Basis of Diagnosis
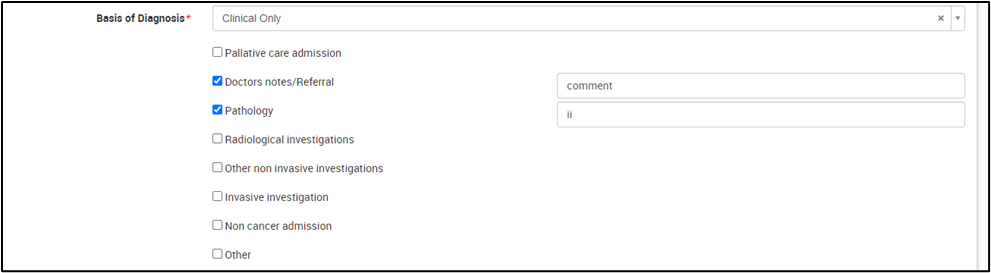
Basis of diagnosis checkboxes do not copy. When a cancer notification is copied, if you have added notes to the basis of the diagnosis area; these are not copied.
Admission history
Currently the system is not displaying the cancer notification column in the patient admission history screen.

Cancer TNM stages
If you select the value 0 from dropdown options, the system is not copying over when you duplicate the cancer notification for an admission.

