About Cases
Cases are used to track the delivery of care over a time period as related to a specific patient goal. This may relate to tracking services delivered for billing, tracking services for statutory reporting (non-admission) or claiming (e.g. DVA or NDIS).
Initial Setup
Prior to using this module, your System Administrator must complete a few steps:
- Create the required Case Categories for your organisation.
- Issue permissions in CareRight for users together edit or view cases see Permissions and what it enables for more information.
Your System Administrator will have access to add or modify your permissions for Cases.
Assigning Entitlement Category to Case Category
To assign an Entitlement to Cases, please make sure the following requirements should be configured. It is required to have account permissions to access admin settings.
- Entitlement Category (Admin > Entitlement Category )
- Case Category (Admin > Case)
From Case Category, select an existing Entitlement Category

Existing Entitlement Categories can be selected from Case Categories

A Case Category can have at least one Entitlement Category.
Assigning Cases to Patients
After the the configuration of Case and Entitlement Categories, An entitlement can be created or assigned to a patient automatically. This automation process checks for the existing Entitlements of a patient.
Upon creation of a patient-case, the system works as follows:
- An automated checking of patient entitlements. If there are available/assigned Entitlement to a patient, the system will display a drop-down field of entitlement list.
- If no Entitlement chosen upon creation of a new Case, the system will create a new Entitlement to the patient. (The new Entitlement will be based from the Entitlement Category defaults assigned from Case Category).
- The system will check and will not display any expired or archived Patient Entitlements.
- This will only work if there are only assigned Entitlement Category on Case Category. ( See above for configuration )
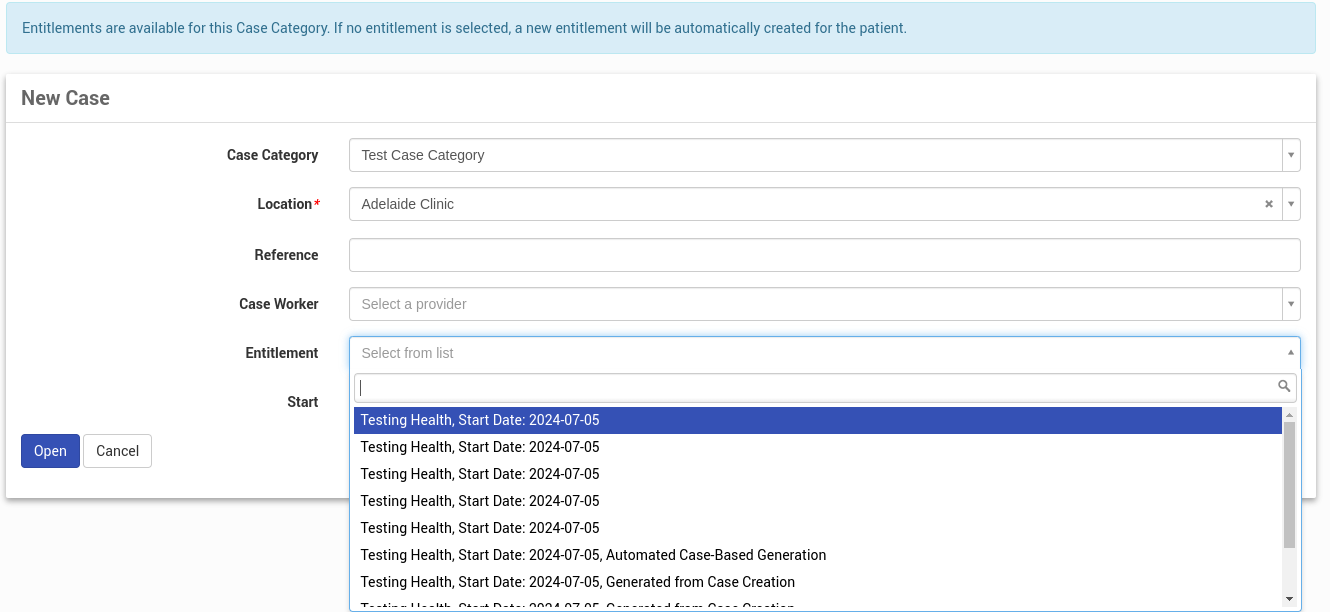 Sample display of a selected Case Category with assigned Entitlement Category (Patient-Case)
Case Panel
To view all cases:
Select Dashboard in the Main Menu.
Click Cases & Programs.
Click on All Cases.

Missing Case Workers Column (New v6.70 Feature)
The Missing Case Worker column displays the number of cases for each category that do not currently have a case worker assigned. For case categories that use mass assignment, CareRight will check the mass assignment and report as "unassigned" cases in locations that have no assigned provider. For case categories not configured for mass assignment, CareRight will check the case worker association.
Missing Events Column (New v6.70 Feature)
The Missing Events column displays the number of cases with missing events (and not the number of actual missing events).For Admins: This column is displayed if the any of the case categories have the "Expect Daily Events" checkbox selected.
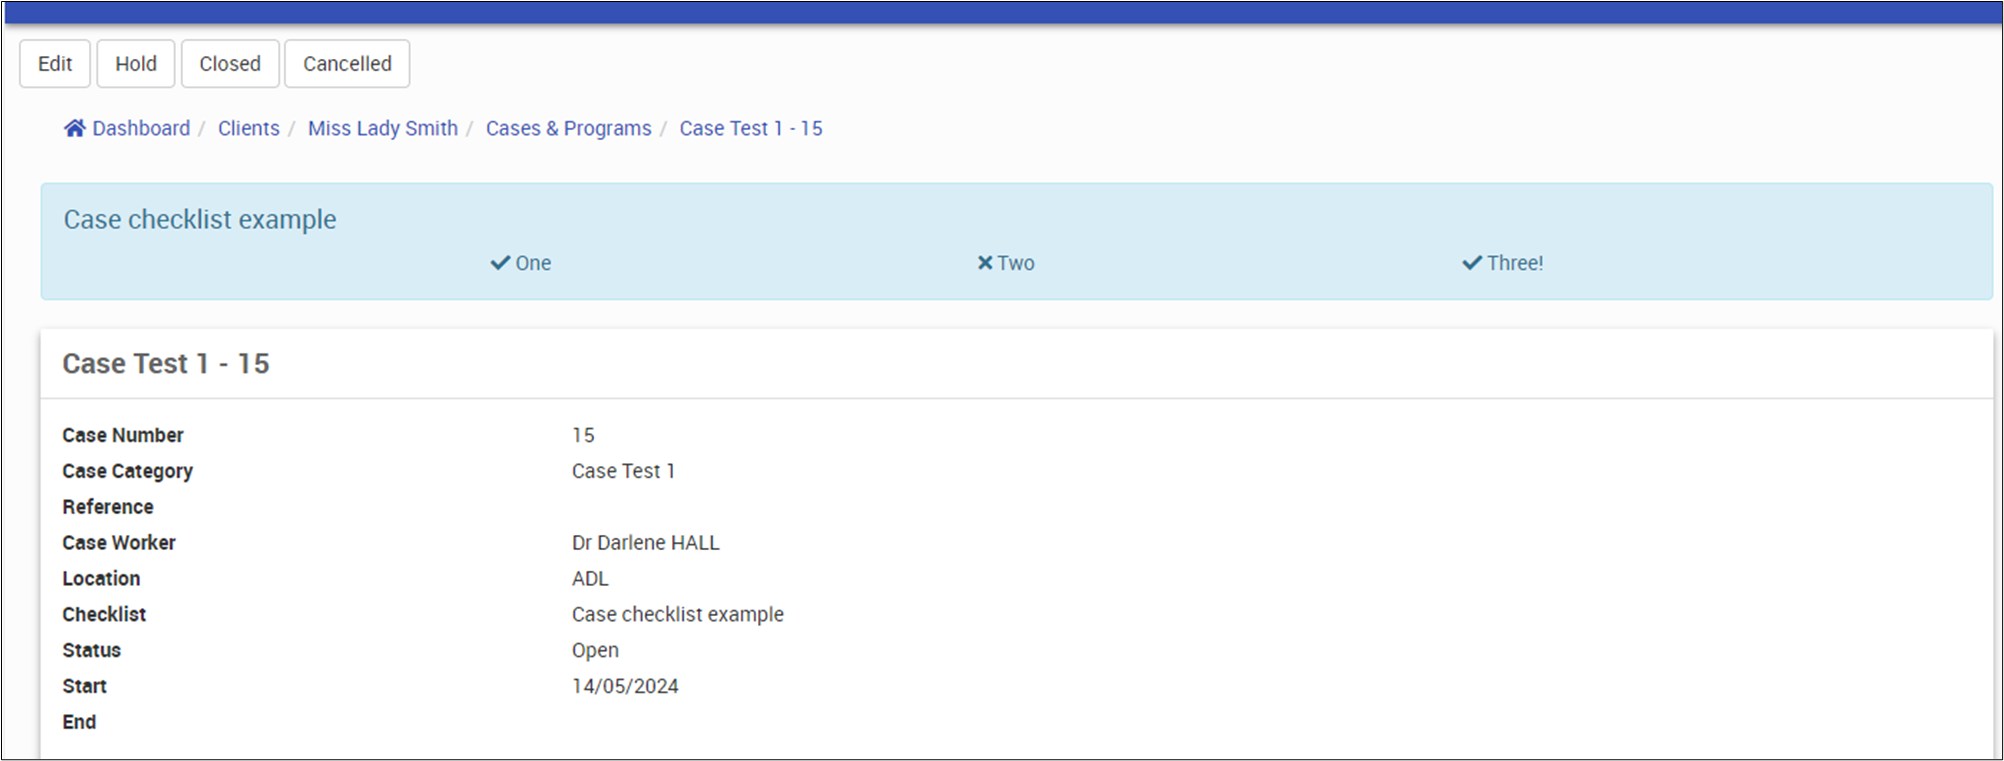
Steps Done
If the case has associated checklist, steps done column displays the number of checklist completion out of total.
General usage
Create a New Case
- Search for a patient.
- Click Show to load the patient.
- In the menu, click Cases & Programs.
- In the Cases screen, click New.
- A blank case record will appear.
- Specify Case Parameters
- In the Case Category field, select a relevant case category.
- In the Location field, select a location where the case is being presented.
- In the Reference field, enter a description of the case.
- In the Case Worker field, search for and select an appropriate provider.
- Optionally, if a Patient Entitlement is associated with this case and available, you can select one at this point.
- If a case category is configured with a patient entitlement and nothing is selected, a new entitlement will be started when the case is opened.
- Enter Start Date
- To open the new case, click Open.
Note: If the case category chosen is DVA Community Nursing and the service rendered is for a White Card holder and the service provided in accordance with the White Card Condition, then tick the box Accepted Disability Indicator.
The case will be given a case number and a start date, which is the current date. The date can be amended by clicking on Show. Likewise, if you have added associate Checklist. you can view by clicking on show.

- Search for a patient.
- Click Show to load the patient.
- In the menu, click Cases.
- A list of cases appears.
- Click Show for the case you wish to edit.
- Click Edit.
- Modify the Reference, Case Worker and/or Start date, case checklist (if any) as needed.

- In the DVA Community Nursing panel, select the checkbox to indicate an Accepted Disability Indicator.
- In the Accepted Disability Text field, enter information relevant to the accepted disability.
- Click Update Case.


Since we have received plenty requests about deleting the cases. So we tweaked the system that Clintel admins have access to the Cancelled button; and no longer needs a dev to do this. (This function is available from 6.78)
1. Go to Dashboard
2. Search for a patient and click show
3. Click case & programs on the left side panel

4. Click show on the case box
5. Click cancelled to delete this case (you need permissions to do that)

How to search cases
To search for cases, from the All Cases screen, click Change Search Criteria.

The Search Options panel appears.

The Search Options panel offers a variety of criteria, such as Case Category, Case Number, Location, Status, and so on. All, some, or none of these can be selected to display case content.
The Case Status field includes the following options:
| Case status |
| Prepare: This is a like a draft status for a case and allows for a case record to be created prior to actually opening the case. A case in a prepare status is not considered open. From a prepare status the status can be changed to either open or cancelled. |
| Open: This is a main state for a case and indicates that case is active and services are being delivered to the patient. From an open status the status can be changed to closed. |
| Closed: This state generally represents a case when services are no-longer being provided to the patient. From a closed status the status can be changed to open. |
| Cancelled: This state is used to represent a case that has not been opened and will never be opened. A case in cancelled state can not have its state changed. |
| Hold |
| Closed - Outcome Achieved |
| Closed - Outcome Not Achieved |
When done, click Search.

This article includes the following topics:
| Topics |
| What is My Cases & Programs? |
| Interface |
| My Cases Panel |
| Today's Progs |
| My Programs |
What is My Cases & Programs?
This screens displays all cases and programs assigned directly to the current user.
Interface

My Cases Panel
Displays a list of cases assigned to the current user.

| Description |
Change Case Assignment Button For Admins: This button appears if the current user has the provider setting "Can be a caseworker" and the role "Can assign cases to self" enabled. If selected, the current assignments can be either removed or changed to a different location(s) and/or changed to one or more case categories. The functionality of this is explained fully in the Cases topic (Bulk Assignment). |
File No. Link and Case Link The File No. Link navigates to the patient summary screen. The Case Link navigates to the specific case information screen. |
Form Button or View Button If there is an assignment that has not yet been approved, then the Form button will appear — clicking it navigates to the assessment screen where it can be created or performed as needed. To learn more, see Create New Assessments. If an assessment has been approved, then a View button will appear where the assessment can be viewed. |
Today's Progs
The Today's Progs panel displays all programs involving the current user that occur today.

| Description |
Prog Link Displays details of the program schedule. To learn more, please see Program Schedules |
Attendance Link Displays the Program Sessions' Attendee screen where patient enrolees and/or providers can be added to the session. To learn more, please see Program Sessions. |
My Progs
The My Progs panel displays all programs associated with the current user.

| Description |
Prog Link Displays details of the program schedule. To learn more, please see Program Schedules |
Manage and Edit Buttons These buttons have the same functionality as the Manage and Edit buttons found in the Program Schedules screen — kindly refer to that topic to learn more. |
Bulk Assignment
Bulk Assignment Matrix - Configuring which Providers handle which categories of Cases
For Case Administrators, often depending on either hospital rosters or the availability of particular case workers, you may wish to set up which providers are the default assignee for new cases of a given category.
The functionality below requires Can assign cases to others and Case administrator.
Note that this only applies to case categories, where the assignment is By Category & Location. Locations must be Enabled for Cases.
Assign a case worker to a given location, category
Here, the Bulk Assignments user interface allows you to configure which providers are configured.

To assign your first provider, find the case category in the table and click on the dash, to choose which case worker is best suited.

To remove, simply repeat the process and clear your selected case worker.
Viewing the current configuration
The bulk assignments matrix shows both locations and case categories. Individual cells show provider initials and, in parentheses, the number of open cases.
| Cell colour definition |
| Blue: Has a provider, but no open cases; |
| Orange: No provider and no open cases; |
| Red: Open cases, but no case worker. |
Selecting Compact shows location names, while Expanded shows location descriptions.
For cells with open cases, the text is clickable, enabling you to change or define the assigned provider.


Reassigning case categories in bulk
The Bulk Assignment tool is used to change the assignment of a provider to one or more locations and select one, or more, case categories. From the All Cases screen, select Bulk Assign Cases to Others.

In the Select Provider field, select a provider and then click Next.

The Current Assignment panel displays the current assignment of location and case categories. To remove these assignments, click Remove Current Assignment.
To change an assignment, in the Change Assignment panel, select one or more locations in the Change Assignment panel and then click Next.
Note that only locations with the "Enabled for cases" setting of "Yes" will appear as a selection.

In the Case Categories panel, select one or more case categories for each location, as needed, then click Assign Selections.

